30 May 2012

Vanilla Cupcakes with Vanilla Buttercream

Pardon for my tardiness in updating this blog. Hubby has been travelling frequently and it was a handful trying to juggle work and the little rascal without his help.

Anyways, back to the topic. I baked this quite some time ago, after I saw postings by a number of bloggers like The Little Teochew and Pig Pig's Corner, who raved about Vanilla Cupcakes with Vanilla Buttercream from Magnolia Bakery. I have never tried any cupcakes from Magnolia Bakery so I decided to give the recipe a try since I have all the ingredients.

While I was going through the recipe, I was appalled by the amount of sugar added. 170g of sugar, vs only 155g of plain flour with self-raising flour! I simply didn't have the courage to add so much sugar so I halved the amount.

In the end, the cupcake turned out so-so only, a little hard and dense, no where near the "light, soft and moist" texture that they were raving about. I suspect it was due to my reduction of sugar. In baking, sugar does make an impact to the texture of the cake (in certain recipes). I should have just gone ahead with the full amount of sugar for the first attempt. Oh well.

They were still edible albeit not the texture that I preferred. For redemption, I tinted the butter cream with a tinge of red to make it pale pink. Well, at least the cupcakes looked pretty?

Ok, I shall leave you to enjoy the eye-candy. Perhaps I would attempt the cupcakes again without altering the sugar amount. Meanwhile, if you are keen in the recipe, hop over to The Little Teochew or Pig Pig's Corner.


19 May 2012

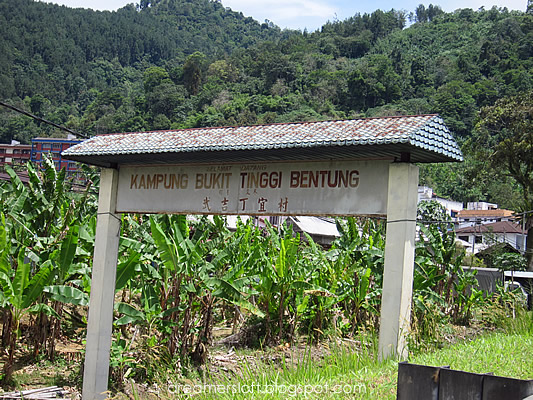
Restoran Foon Lock, Kg Bukit Tinggi Bentung, Malaysia

Last weekend, our family went on a roadtrip to Genting Highlands, Malaysia. During the return journey, Hubby brought us to this quaint little town just 10 mins away from the foot of Genting Highlands (towards direction of Kuantan) - Kampung Bukit Tinggi Bentung.

He sort of found out about this place through a Channel 8 or U travelling food show hosted by Bryan Wong. Apparently this little town is well known by the locals for its river fish dishes.


As we turned into the town, we spotted several eateries claiming to sell the best river fish dishes, but we drove on until we reached the heart of the town where it was bustling with life with several roadside vegetable stalls. The particular eatery Hubby was looking for, is known as Restoran Foon Lock.


Several vegetable stalls selling local produce, some of which we have never seen before, like a leaf-like vegetable with one side purple and the other green.

 Too many interesting specialty dishes that we didn't know what to order.

Since we were there for the river fish, it was a must-order dish. Settled on Tapah fish as we haven't try this fish before. I think most locals go for the bak sou gong/patin/catfish?

Steamed Kampung Chicken. Wow, this is the true blue Kampung Chicken with yellow skin! The meat was very chewy and flavourful, so unlike the usual chicken we eat. Even the Kampung Chicken sold at our local wet market isn't quite the same in terms of texture and taste.
Stir Fry Yin Yang Vegetable. It's a hybrid of Kailan and Choy Sum and tasted so much nicer than both the vegetables. It's crunchy yet tender, juicy and sweet, we totally love it!
The highlight of the meal, Claypot Tapah Fish. My my, the fish was tender and succulent and surprisingly no muddy taste/smell at all, which is normally detected in fresh water fish. The sauce was quite flavourful yet light and complemented the fish very well. Thumbs up!

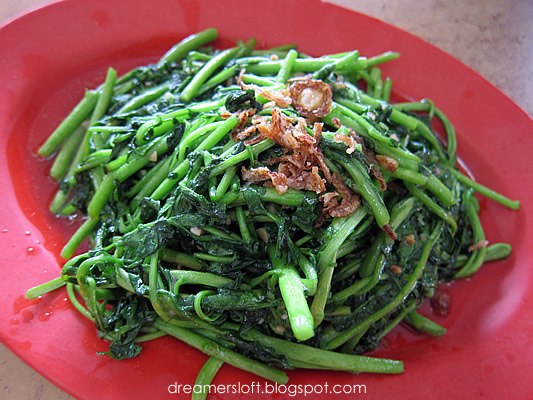
Another Stir Fry Vegetable, Water Cress. As we like the Water Cress at Cameron Highlands very much, we wanted to try whether this would be as good. It was not bad, but not as tender as those found at Cameron Highlands.

Last dish, Steamed River Prawn. The prawns were huge! While the meat was very crunchy and succulent, we thought it lacked the sweetness of sea prawns.

All in all, it was a fantastic meal, something new and refreshing. Best part, it was pretty affordable at RM210 (4 adults 1 kid, with rice and drinks)! I guess we would be making a detour here whenever we head towards this part of Malaysia. Next time I want to try their wild venison, wild boar etc etc :d~~

10 May 2012

Sausage Soft Bun

Presenting my Sausage Soft Bun!


Ever since I made the Cheese Bread Sticks using the Tangzhong method, I've been very keen to try baking it again as I thought I didn't go through the steps properly enough. In fact, I tried searching for the original recipe book, 65度C汤種面包 (65 degree celsius Tang Zhong Bread) but to my dismay, both Kinukuniya and Popular indicated that this book is out of stock; even tried Taiwan online bookstores books.com.tw and eslite.com.tw and they even indicated out of print! I gave up hope of finding the book and a few weeks later when I went back to Kinukuniya again, I found a copy on the shelf! I grabbed it immediately, lucky me!!!
Having the book helps alot as there are pictorial description of the Tangzhong method with many useful tips like how to check for right elasticity of the dough and so on.
So over the past weekend, I proceed with sausage soft bun as my first test recipe from the book. As I didn't want to bake too much bread (recipe yields 9 regular size sausage bun), I halved the tangzhong recipe as well as the sausage soft bun recipe.
Basically my dough weighed about 275g after first proofing, so I divided the dough into 7 pieces of 38-39g each. I also decided to make a spiral design of the bread, instead of a flower design like the recipe book.

My sausage bread turned out slightly smaller than regular size, about 5-6cm long just the size I like :) Taste-wise, the bun tasted great, especially with the saltish Arabaki (coarse ground sausage made with pork) which was juicy and crunchy. In terms of texture of the bun, it was soft and fluffy when hot from oven, but turned a bit hard the following day. I had to pop the buns into an oven for a few minutes for the bread to become slightly softer.

Part I - Tangzhong (half recipe)
Ingredients
  • 50g bread flour
  • 250g water
Method
  1. Mix the bread flour and water together and stir well.
  2. Bring the mixure to low heat, stirring constantly.
  3. Heat till the mixture reaches 65 degree celsius or when lines start to appear while stirring the mixture.
  4. Cover the mixture with clingwrap and let cool completely before use. *Press the clingwrap all the way to the surface of the mixture.
Part II - Sausage soft bun (half recipe, yields 7 pieces)
Ingredients
  • 97.5g bread flour
  • 45g plain flour
  • 3g instant dry yeast
  • 3g salt
  • 15g caster sugar
  • 5g milk powder
  • 30g egg
  • 32.5g water
  • 37.5g Tangzhong
  • 22.5g unsalted butter, slightly soften
Method
  1. Mix bread flour, plain flour, instant dry yeast, salt, caster sugar and milk powder into a mixing bowl and mix well.
  2. Add egg, water and tangzhong and start kneading the dough using the dough hook.
  3. Once the dough gluten starts to form, add the unsalted butter bit by bit into the dough, and continue kneading the dough on high speed till dough starts to leave the bowl.
  4. Test the dough using "Window Pane" method. Take a small piece of dough and stretch the dough into a rectangular size thinly and becomes translucent. A small hole will start to tear and the dough is ready if the hole shows jagged edges.
  5. Place the ball of dough into a slightly oiled bowl and cover with clingwrap. Proof for about 40 mins at room temperature (about 28 degree celsius, 75% humidity).
  6. After 40 mins, poke a well-floured finger into the centre of the dough, if the hole remains, the dough is ready.
  7. Cut and divide the dough into 7 pieces, each piece should weigh about 38-39g. Roll each dough into balls with edges neatly tuck in at the bottom. Proof for 10 mins.
  8. Once the proofing is done, roll each dough into a long rope and wrap the rope around a sausage. Make sure the sausage is dried using a kitchen towel.
  9. Proof for about 40 mins at slightly higher temperature (38 degree celsius, 85% humidity). I switched on the light in my oven and proofed the buns inside the oven.
  10. After 40 mins, brush the surface of the sausage dough with some egg wash and bake in oven for 15 minutes at 180 degree celsius.
  11. Best served warm!

Here's the Arabaki sausage that I bought from Cold Storage, the sausages are smaller than the regular size ones, probably slightly bigger than my fingers about 5-6cm long only. But both hubby and I love the taste and texture which was juicy and crunchy and we thought it was perfect with the soft bun.
In conclusion, I still think that Chef Valerie's Japanese Yukone method (of mixing boiling water with bread flour and leaving the mixture in the fridge for 24hrs) yields a softer and fluffier bread texture which remains so the following day; the only downside is it has to be prepared at least 24hrs in advance, unlike the 65 degree celsius Tangzhong method which could be prepared just before making the bread. Well, I guess if I were in a hurry or didn't plan my bakes in advance, I would fall back on this tangzhong method, but if possible stick with the Yukone method.

That said, I'm still a noob when it comes to bread making, so will probably test a few other recipes from my new book when I have the time. Till then!

05 May 2012

Francfranc at JCube Singapore

One of my favourite lifestyle and home furnishing store from Japan has opened a branch in Singapore! In fact, not just one but gonna be two! The branch at JCube (Jurong East) has just opened recently on 1 May and the other will be opening soon at Vivocity on 1 June.

I'm really excited coz I can satisfy my craving for zakka shopping anytime now, since flying to Japan gets tougher with a toddler and a job.

Went to JCube specially today to check out the store; merchandise is categorised into different sections like furniture, bath & accessories, wall furnishings, living furnishings, stationery, kitchenware & accessories etc.

These are my haul for today, not much :p
A longish porcelain serving plate and a wooden serving plate for my swiss rolls as I realised I don't have any serving plates for swiss roll, a kitchen cutlery holder as my current one is a tacky plastic one, a leather case holder to hold my company pass and ezlink card, a plastic cutlery set which includes convertible spoon, fork and chopsticks, useful for my homemade lunch to the office, a bath sponge and a glass.

I love the pale blue longish serving plate, thought it looks elegant and vintage. And the glass, it's just too pretty to resist :p

There are several other stuff that I'm tempted to buy, but decided to go slow for today. I have a feeling I'm gonna be a frequent shopper of Francfranc Singapore :ppp

01 May 2012

Strawberry Shortcake Swiss Roll

I did it! I did it! Proudly presenting my Strawberry Shortcake Swiss Roll that I learnt from Chef Aki last weekend at Shermay's Cooking School. As I mentioned previously, I had this fear of making swiss rolls, but Chef Aki's recipe looks so promising that I convinced myself to give it a go. And I was really glad that I did! I paid extra attention during class and took down whatever tips she said diligently and I was pleased that my "hardwork" paid off.

I repeat that I would not be sharing the recipe here as it's under copyright by the Chef and Cooking School. What I can say, if it's of any help, is I used some Japanese ingredients as recommended by Chef Aki, like Nissen Violet Flour and Jyohakuto sugar which can be found at Meidi-ya or Isetan Supermarket. I already have them in my pantry actually; the Nissen Violet Flour was highly recommended by Chef Daniel Tay (for Strawberry Shortcake) and the Jyohakuto sugar  was recommended by Chef Aki during one of her past workshops on Japanese homecook dishes. Oh, in addition I used milk from Hokkaido, well the quantity is quite negligible so I think it doesn't really matter what brand.

The sponge making process was straightforward and I was really excited when it turned out looking quite good. In my "zealousness" to start rolling the swiss roll, I forgot to brush some kirsch syrup onto the sponge :( and proceeded with spreading the whipped cream. Oh well.

Next the rolling part, which was a little nerve wrecking as I was afraid that the cake might crack. Indeed I was a little tentative when I rolled the cake and it cracked a tiny winy bit :( Never mind, I could cover up using whipped cream :p I guess I should have just rolled the cake swiftly.
The final product looked alright, but I thought it looked a little flat. Must roll the cake better next time; and I think I sliced the strawberries too thinly. Nevertheless, I think it was an encouraging attempt and I will definitely do this again. I also realised I don't have a longish plate to serve the cake in; had to use my chopping board :p I must go Robinson to hunt for a nice longish serving plate soon :p
Tastewise, the sponge was tender and moist, just the way I liked it, like those sold in Japanese pattiserie; the whipped cream and strawberries complemented the cake very well indeed. For deco purpose, I spreaded whipped cream over the roll too, but probably could omit next time if it's just for home consumption. So yep, definitely gonna make this again :)