28 November 2012

Koh Samui Oct 2012 Part I - Hansar Samui Resort, Bophut

Hubby and I has been pinning for Koh Samui for a long time and finally we made it this October! Why Koh Samui again? Well, we love the "Tiger Balm" massage there (can't be found anywhere else e.g. Phuket) and our favourite Thai restaurant "SabiengLae" offering yummy thai food at reasonable prices. If air tickets weren't so ex (as compared to Phuket, Bali etc), we would have gone more frequently!

It has been more than a year since our last trip; for that trip, we brought dear son along and had to take turns for massages and cater to his needs all the time so it wasn't very relaxing or convenient. And the trip before the last, I was preggie and didn't get my favourite "Tiger Balm" massage. So this time, it was just us =D

Basically just a short 3D2N getaway, via Bangkok Airways on Friday night and return on Sunday afternoon. Our itinerary was pretty R&R.
Friday night - Check-in, Bophut Walking Street (every Friday night)
Saturday - Breakfast at resort, laze in room, rent a bike to go Sabieng Lae for lunch, Chaweng to walk around and massage, Bophut Fishingmen's Village to walk around, back to Chaweng for massage and supper
Sunday - Breakfast at resort, laze in room, check-out, massage at nearby spa, late lunch at airport

For the next few posts, basically I'll cover the resort we stayed in, the food we had, spa and briefly on Bophut.

For this trip, we I chose to stay at Bophut as we stayed at Chaweng the past 3 trips and thought of trying a new place. And I wanted to go to the Bophut Walking Street which is an open-air bazaar style every Friday from 5pm till 11pm. Staying at Bophut itself would be more convenient. After much research and reviews, decided on Hansar Samui Resort. Hansar Samui is just a stone's throw away from the walking street ;)

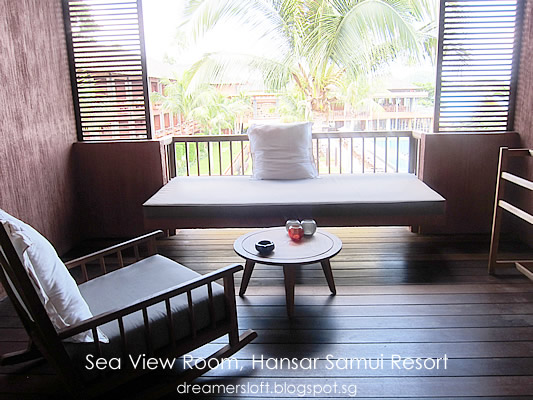
We booked a Sea View Room, other categories include Sea View XL and Beach Front. We reviewed the photos on the room types and reckoned that Sea View Room should suffice :)

This is the view of the room, taken at the balcony area, pretty sizeable and well-appointed with warm, woody colours.


Plasma TV. Wifi is provided free all around the resort. I guess a necessary service these days.


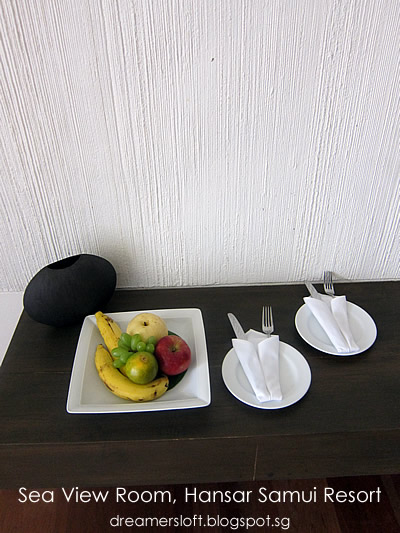
Complimentary fruits.


Complimentary coffee/tea making facilities, and a mini bar (chargeable) inside the cabinet. 4 complimentaty bottles of mineral water were provided daily.


The spacious shower area, but there's no door so water could be splashed out into the changing area. Oh, I love the tassel curtains, which gave a soft touch to the room.

The balcony area which I lounged around most of the time. I love the rocking armchair; if I have a balcony I would want something like this :)

The balcony overlooks the garden and pool.

As well as the sea, well, diagonal view. Hubby was a little disappointed as he thought that sea view room means facing the sea. But to me, this is good enough. Anyway, he spent most of his time indoors enjoying air-con. I was the one who prefer the balcony.

The reception area. Service standard was quite good, although our request for late check-out was rejected :(((( which was a big disappointment and lowered our overall experience at the resort.

The staff claimed that the room was booked for another guest checking in after us. We thought it was bulls***. The flight was at 4+pm, and the transfer would leave the resort at about 2pm. So far, all the resorts we stayed in allowed late check-out at 2pm.

Mini library at the lobby area.

Infinity pool. Heck, we didn't even swim because hubby was lazy!

The pool looks inviting right?


There's a tiny pool for kids to waddle around, water toys are even provided. Parents could lounge around at the cabana while watching over their kids.

The open bar area, which offers Happy Hour 3 times a day. Well, we don't drink though.

H Bistro, the only restaurant at the resort. Both levels are opened for breakfast. The upper deck is known as The Chill Lounge. We only had breakfast here and didn't manage to try lunch or dinner.

Alfresco dining which boasts lovely view of the sea. For our first breakfast there, we sat here briefly till someone from the next table started smoking and we were forced to shift.

As the indoor seating on the lower floor was full, we went to the upper deck, which was offered even better view.
The lounge sofas would be nice to chill out.

Very quiet stretch of beach here.

Dining under the Stars, reservation required.

The water is clean, but sand is not powdery, feels a little coarse.

There are several other resorts further left, like Anantara but we didn't have time to explore.

Overall, Bophut is considered a more laidback area and suitable for people who wants a more relaxing and quiet holiday.

Next up, Bophut and the walking street. To be continued.

05 November 2012

Going bananas - Banana Cake and Banana Cream Cheese Muffin

I went bananas over the weekend, by baking 2 banana recipes! Ever since I saw Annie's FB posting on her moist banana cake recipe, I was obsessed with it! It's been yonks since I baked banana muffins and suddenly I had this huge craving :p The photo posted by Annie was simply too tempting lah!
 
The thing about banana cake is, we have to use very ripe, in fact over-riped bananas. We are not big on bananas in my family, I mean we buy them only occasionally, so I didn't have any bananas on hand to bake! Was at the supermarket and decide to just buy a bunch and let it ripen. Wanted to buy the small ones as recommended by Annie but they were sold in huge bunches of at least 20 bananas, why would I want so many of them? Had to settle for the usual Delmonte ones. Silly me, should have just go to the wet market.
 
Anyways, I patiently waited for the bananas to ripen (even put them into a plastic bag together with an apple to hasten the ripening process) and finally on Saturday evening, it was time to bake!
 
Started on the banana cake recipe first. The steps are pretty straightforward and I didn't modify any ingredients or steps. I used about 4 bananas which came to about 240g as stated in the recipe.
 
The baking time took about 50-55 mins and thereafter I had to wait for about 20-30 mins to let the cake cool down before removing it from the baking tin. It was still quite hot when I removed the cake so I let it cool down further and finally after another 15 mins, I couldn't stand it anymore and decided to just cut a corner to munch. I was famished coz I didn't take dinner to save tummy space for the cake :p
 
 
It was sooooo good! Moist and tender with intoxicating taste of banana! It must be the best banana cake I've ever eaten =D
In fact, the banana cake tasted even better the next day as the banana flavour was fully infused and developed.


As I was washing up and waiting for the banana cake to be baked, I stared at the remaining 2 bananas and decided to just use them up. I remember seeing a Banana Cream Cheese Muffin by Rasa Malaysia recently and very intrigued by how it would taste like.

I refered to both the recipes by Rasa Malaysia and the original author, Bakedbree, and combined/adpated the methods of both :)

Banana Cream Cheese Muffin
(makes about 15-16 regular size muffins)

Banana Muffin
  • 192g plain flour
  • 1/4 tsp baking soda
  • 1/4 tsp baking powder
  • 1/4 tsp fine salt
  • 1/2 tsp ground cinnamon
  • 112g unsalted butter, room temperature
  • 112g cream cheese
  • 90g caster sugar
  • 60g soft brown sugar
  • 1 large egg
  • 1 tsp vanilla extract
  • 2 over-riped bananas, mashed
  • 15-16 pieces walnut
Cream Cheese Filling
  • 112g cream cheese
  • 1 tbsp caster sugar
  • 1 tbsp plain flour
  • 1 egg
  • 1 tsp vanilla extract
Steps
  1. Preheat oven to 180 degree celsius.
  2. Mix all the ingredients of the cream cheese filling until well blended and smooth. Transfer the filling into a piping bag fitted with a small pointed piping tip. Set aside preferably in fridge as the filling is a little runny.
  3. Sieve the plain flout, baking soda, baking powder, fine salt and ground cinnamon. Set aside.
  4. Beat the butter, cream cheese and sugars in an electric mixer till creamy and fluffy.
  5. Add the egg and vanilla extract, mix until combined.
  6. Add the dry ingredients, one tablespoon at a time, mix until just combined. Do not over mix.
  7. Gently fold in the mashed bananas.
  8. Using spoon or ice-cream scoop, fill each muffin case with the batter about 3/4 full.
  9. Pipe cream cheese filling into the batter. Top with walnut.
  10. Bake for 20-25 minutes.

Ok, so how did the Banana Cream Cheese Muffin taste like? It was quite a complex taste, with the aroma and taste of banana, a tinge of saltiness from the cream cheese, distinct taste of cinnamon, nuttiness of walnut... Very moist and a little dense.


Verdict from hubby? He prefered the good old banana cake. I agree with him. The traditional banana cake is simple and straightforward, just the rich taste of banana, nothing more to complicate the tastebuds. The banana cream cheese muffin is confusing with too many different tastes vying for attention. Although it is nice, you get sick of it after a few bites and the tastebud got overwhelmed. But the banana cake, you could have a few slices at one go and still craving for more! Well, I must compliment the muffin for it looks prettier than the banana cake. 外在美  vs 内在美!

I gave a quarter of the banana cake to MIL, and hubby brought half to his office. According to him, the cake received ravings from his colleagues and there weren't enough for seconds.

Ok, not sure if I would give the banana cream cheese muffin a second chance, it did look very pretty you know. Probably I would omit the cinnamon next time to see how it goes. But for now, I'll stick to the banana cake recipe.


31 October 2012

Savoury Cheese & Dill Muffin

How time flies, couldn't believe that it's already end of October! Been really slacked this month, partly because I was feeling blue, and to make things worse, dear son was sick for one full week! It was a terrible week for hubby and I for dear son's fever was quite high and persisted day and night for 5-6 days. We returned home from a Bintan weekend getaway and he developed a high fever. The PD diagnosed his condition as stomach flu virus and assured us that he would get well in 4 days. However, the fever persisted and we had to go to KKH for blood test in case of any bacterial infection. Thankfully, the blood tests indicated a viral infection rather than bacterial, and he got better. *Phew*.
 
Hadn't been baking much, except for a batch of blueberry muffins (specially for dear son to entice him to eat) and I really missed baking! I have a whole list of to-bakes and it just gets longer each day as I browsed through other bloggers' recipes and pictures on FB. *sigh* but I simply couldn't muster the energy. 心有余而力不足!
 
And finally the night before, I just had the urge to bake. That was despite the fact that I had a weary day at work and reached home late after dining out, grocery shopping and food preparation for next day's dinner. Decided to bake a simple Cheese & Dill muffin to use up the grated cheese, Greek yogurt and milk I had in my fridge. The recipe is adapted from a user-submitted recipe found at nigella.com, and I made several modifications like adding more cheese and using mixture of unsalted and salted butter. And couldn't find fresh dill at the supermarket so I used bottled dill weed. For cheese, the recipe stated cheddar but I just used what I bought previously, those ready grated cheese meant for pizza and I think it turned out fine :p
 

Cheese & Dill Muffin
(Makes 16 regular size muffins)
  • 256g plain flour
  • 1 tbsp baking powder
  • 3/4 tsp salt
  • 2 tbsp caster sugar
  • 280g Greek yogurt
  • 35g salted butter, melted
  • 10g unsalted butter, melted
  • 1 large egg (about 60g with shell)
  • 120g fresh milk
  • 100g grated cheese
  • 2 tsp dill weed
  1. Preheat oven to 200 degree celsius.
  2. Sift flour with salt and baking powder, then stir in the sugar and dill. Set aside.
  3. Combine egg, yogurt, milk and melted butter.
  4. Gently mix the wet ingredients and dry ingredients, and fold gently until just combined. Fold in grated cheese. Do not over-stir or the muffin will turn out tough.
  5. Fill the muffin cups with the batter to 3/4 full.
  6. Bake at 200 degree celsius for 20 mins.
  7. Best serve warm.
Notes:
  • I replaced plain yogurt with Greek yogurt.
  • As I have some salted butter leftover, I used a mixture of salted and unsalted butters.
  • I replaced cheddar cheese with pizza cheese (I think combination of cheddar, mozzarella and Parmesan) and increased quantity from 50g to 100g as I wanted a more cheesy taste.
  • I replaced fresh dill with bottled dill weed. If using fresh fill, quantity is 1/4 cup.
  • If eaten the next day, heat up in microwave oven first.
The muffins smelled heavenly as they were baking in the oven, and I couldn't wait to munch into one even though it was already late night by the time they were ready. Fattening yes, but I couldn't care less. Savoury muffins are comfort food, who could resist cheesy goodness! The taste of dill was almost negligible and I wonder if fresh dill would make any difference? Anyways, I'm happy with this quick fix for my cravings.

I found another carrot, zucchini and dill muffin recipe and have added it to my to-bake list. Hope I will pick up my baking and blogging mojo soon.

15 October 2012

Jap-Italian Desserts Workshop


Sorry for the MIA. Was suffering from fatigue recently and simply didn't have the zest to do anything at all :(
 
Anyways, I was invited by Shermay's Cooking School to attend a demo workshop by Chef Aki Watanabe on "Japanese-Italian Desserts". I had seen this workshop at Shermay's website but didn't sign up for it as the timings clashed with my son's gym class. Then the invitation came along and as I'm a fan of Chef Aki, I made arrangement for hubby to send dear son to his class :p
 
The recipes demo-ed are actually specially created by Chef Aki, to incorporate the Fabbri products namely Fabbri Amarena (cherry), Fabbri Fragola (wild strawberry) and Fabbri Mirtillo (blueberry) into Jap-Italian desserts. In fact I've tried the Fabbri Fragola before, using the wild strawberries as a topping for a Oreo Cream Cheese Cupcake (recipe by Chef Daniel Tay), I must say the wild strawberries are very yummy, albeit very sweet.
 
5 recipes were demo-ed during the 2-hr workshop. All the recipes are designed to be very simple with easy-to-follow steps.
 
1) Calpico (Japanese Yogurt Syrup) Cherry Kanten Agar Jelly (Using 'Fabbri Amarena Cherries')

2) Strawberry White Nama Choco (Using 'Fabbri Fragola')

3) No Bake Tofu Cheesecake with Blueberry Sauce (Using 'Fabbri Mirtillo')

4) Strawberry Gyuuhi Mochi (Using 'Fabbri Fragola')

5) Soufflé Omelete with Blueberry sauce (Using 'Fabbri Amarena')
 

All participants were given a portion of the Calpico Cherry Kanten Agar Jelly for tasting and I love it! Calpico is a type of Japanese yogurt syrup, I've tried the diluted version before, it tasted a little like Yakult/Vitagen and Isotonic drink. So the taste of this jelly is a little tangy and sweet. The cherry embedded in the middle enhanced the taste and texture of the jelly. I love the fact that the jelly was made petite size which was pretty, and easy to eat (just pop into the mouth). In addition, the jelly can stay in room temperature due to the unique setting property of Japanese Kanten. So I can forsee making these jellies for parties or gatherings already.


The strawberry white nama choco is basically white chocolate with whipping cream, butter and chopped bits of Fabbri wild strawberries. We also got a tasting portion in class.
Unfortunately it was way too sweet for my palate. If I were to use this recipe, I might change the white chocolate to dark chocolate for a milder sweetness and taste.

The strawberry gyuuhi mochi uses Fabbri strawberries as well, basically Jap glutinous rice powder with sugar and chopped bits of wild strawberries. We didn't get to try this though as it's difficult to make enough mochi mixture for the entire class. But I can imagine that it's yummy coz I love mochi.


The tofu cheese cake with blueberry sauce is also easy to make and quite a versatile dessert. We could either make it into a 15-cm round cake or as individual serving portions. The cake was very rice and quite tangy with additions of yogurt and lemon juice. The sweetness from the blueberry complimented the cheese cake quite well. If you want the tofu taste to be more distinct, taste the cake within a day. Else, wait for up to 3 days and the tofu taste will be barely noticeable, leaving a very rich and creamy cheese cake.

The souffle omelette is very unique indeed. I think it's somewhat like a pancake with beating of eggs and sugar till fluffy then added with flour. But it's very difficult to cook as the insides need to be soft and gooey and outside slightly browned and crispy.

These are the 3 Fabbri products. The bottles are quite pretty too. Although I've used up the wild strawberries long time ago, I still kept the bottle :)

Will find an opportunity to make the Calpico Cherry Kanten Agar Jelly... after I get over my sluggish mood.

24 September 2012

Sōmen salad


When I started working about 5 months back, I was a little worried about eating too much hawker/canteen food (for lunch). You know, the temptation to over-indulge is always there - oh the fish cutlet rice looks good, hmmm, how about some beehoon with chicken wings? That kueh bomb (banana ball, one of my favourite Malay snacks) is calling out to me, and oh oh, curry and sardine puffs just taste so scrumptious on rainy days... yada yada :p I know myself, I tend to put on weight very quickly if I eat mostly hawker food.

So far, I've been trying to control myself, by bringing salad or home-cook food for lunching in at least 2 to 3 times a week. And if I do eat hawker food, I'll go for Yong Tau Foo beehoon soup with lots of veggies. Oh well, probably once a week or fortnight, I'll indulge in some Malay rice with my favourite achar, tempeh and curry chicken, or Chinese economy rice with my favourite sweet and sour pork.

The salads are usually very simple to put together. Basically mixed greens or baby spinach from Cold Storage, with Jap cucumber, cherry tomatoes, steamed sweet corn kernels, boiled shredded chicken, fruits like strawberry or orange, nuts and dried cranberries. For seasonings, I usually go for balsamic vinegar or sun-dried tomato vinaigrette. The shredded chicken is in fact extracted from the chicken breast carcass that I use for making chicken stock (no waste).

Sometimes, I add in a little carbo just to make the meal more fulfilling. On hungry days, protein and fibre just doesn't seem satisfying enough! This Sōmen salad is inspired by OKC's Udon Salad. Personally I don't really like Udon, prefer thinner noodles like Soba or Ramen. Then I recall that I have 3 packets of Sōmen sitting in my pantry, bought at Isetan Supermarket sometime back, and they are just perfect for as a "Main Course" salad. 

Ingredients used are really simple - salad greens, cucumber, carrot, tomato, Sōmen, cooked shredded chicken, toasted sesame seeds, sesame dressing, Jap mayo.

First, cook the Sōmen in boiling water added with pinch of salt and olive oil, to al dente. Thereafter, rinse with water and set aside to cool. Shred some cucumber and carrot into matchstick sizes. Toss carrot, cucumber together with Sōmen, add sesame dressing and Jap dressing to taste. Toss the shredded chicken with some Jap mayo and black pepper.

To assemble, place some greens as the base, then twirl the Sōmen and lay them on top of the greens. Top with shredded chicken, tomato, cucumber and finally sprinkle some toasted sesame seeds.

This is somewhat similar to those cold noodles served at Jap restaurant, and makes a perfect meal during hot summer days :)


These are the 3 packs of Sōmen that I bought at Isetan Supermarket. Pretty and apetising looking yeah? Yellow - original, green - green tea and pink - ume (plum).

This Sōmen salad is quite versatile I would say, you can combine with just anything, from greens to fruits to tuna, hardboil egg etc. I think this would be one of my staple lunch during the work week from now onwards :)

18 September 2012

Decadent fried beancurd skin roll (with Alaskan King Crab filling)

Ever since I tried Shirley's homemade Ngoh Hiang at our Homebaker's gathering, I've been wanting to try the recipe (which she kindly posted in her blog); she had mentioned that the recipe was not complicated and quite manageable. I used to dislike Ngoh Hiang, especially those sold commercially as a lot of fatty meat was used, too oily and heavy on the palate for my liking. But hers was surprisingly light with a well-balanced blend of minced pork, prawn, crab meat and water chestnut, and tasted nice even when cold.

The peculiar thing is, traditionally Ngoh Hiang also known as "Five Spice Roll" has five spice powder added, but this recipe doesn't include the spice. Only salt and pepper are used. She admitted in her blog that sometimes she would add some five spice powder to give the name its authenticity :)

So as I was going through the recipe, I had two dilemmas. Should I add five spice powder so that this is indeed the Ngoh Hiang, or should I just go along with the recipe? Which means that it's more of a beancurd skin roll like those sold at Dim Sum restaurants? But it seems that fried beancurd skin rolls actually have additional ingredients like chives and carrots. Finally, I decided to just call it beancurd skin roll, it doesn't really matter :p Anyway, hubby prefers beancurd skin roll than Ngoh Hiang too.

Next came my second dilemma, one of the ingredients is crab meat and I was contemplating whether to use imitation crab meat, or really buy a crab, steam it and extract the meat. Then it so happened that I attended a dinner with hubby where there was a whole steamed Alaskan King Crab (which typically cost around $400-500!). When there was leftover, I happily accepted the offer to "tabao" home =D Just perfect for the beancurd roll, in fact a very DECADENT one. I managed to extract around 130g of crab meat, which I reckon cost $40-50?

My two dilemmas were solved, YAH!


The whole process was quite simple just a little tedious as there are multiple steps to the recipe. I bought a sheet of beancurd skin from the wet market (cost 70 cents). It's a very large sheet which I cut into slightly bigger pieces (than what was stated in the recipe), about 12 cm by 13 or 14cm. I wanted to wrap them like those beancurd skin rolls sold at dim sum restaurants. The beancurd skins were very salty so I painstakingly wiped both sides of each piece.

For the pork, I didn't bother with the lean or pork belly, just bought about $3 worth of minced pork. For the prawns, I smashed each one with the back of the cleaver and roughly chopped them up instead of mincing them (as I wanted to retain the bite of the prawns).

There were around 32 pieces of skin, but I managed to wrap around 29 pieces only as I was over-zealous with the amount of filling in the beginning :p


Fried Beancurd Skin Roll
  • 1 large sheet of Beancurd Skin
  • 280g Minced Pork
  • 130g Prawn Meat
  • 130g Crab Meat
  • 7-8 pieces Water Chestnut
  • 1 Egg
  • 1/2 tsp Salt
  • 2 dashes Pepper
  • 1 tbsp All purpose flour
  • 1 tbsp Water
  • Oil for deep frying
  • Water
Steps
  1. Cut the beancurd skin to about 12cm by 13 cm rectangles.
  2. Wipe down the beancurd skin with a damp clean towel to remove excess salt.
  3. Wash the water chestnuts and peel. Dice the water chestnut and set aside.
  4. Light beat egg and set aside.
  5. In a mixing bowl, mix together pork, prawn, crab meat, diced water chestnut, beaten egg, salt and pepper and mix well. (you can add a 1/4 tsp of 5 spice powder here if desired)
  6. Mix the flour with water to form a paste. This will be used as a ‘glue’ to seal the folded edges of the roll.
  7. Place roughly a tablespoon of filling in the center of one sheet of the cut beancurd skin. Apply some flour paste along the edges of the skin. Fold one side of the beancurd skin over the filling and fold the other side to overlap. Flatten the filling slightly, and shape the filling into rectangular shape during the process. Press the ends of the beancurd skin to seal.
  8. Repeat until all filling / beancurd skin has been used up.
  9. Steam the rolls for about 5mins.
  10. Cool down the rolls and pat dry with kitchen towel. Deep fry the cooked rolls in oil to golden brown.
  11. Drain and serve with your favourite sauce (sweet chilli sauce, mayonaise, vinegar).

The beancurd skin rolls were very well-received by hubby and dear son. The skin was crispy and still slightly salty (thank goodness I wiped the skin first otherwise would be overly salty), and the filling was fresh, juicy and savoury, enhanced by the sweetness of the Alaskan King Crab :))) I guess I would make this once in a while only since I seldom do deep frying at home, moreover, it's not everyday that we get crabs (pun intended!).

12 September 2012

Salted Caramel Cupcakes

I've always liked sweet stuff with a tinge of saltiness, as the saltiness brings about a different savoury dimension to the palate, like the Salted Chocolated Chip Cookies that I made before. Then I recalled seeing Salted Caramel Cupcakes somewhere, either from some bakery or someone's blog.
 
A search on the internet brings up a number of posts on Salted Caramel Cupcakes but most of them point back to the recipe by Sprinkles Bake. So I guess this must be the recipe worth trying.
 
At first I was quite daunted by the multiple components involved - the cupcake, the filling and the frosting but pushed on since I'm really curious as to how the cupcakes would taste like.
 
Here, I adapted Sprinkles Bake recipe by converting all the measurements from cups to grams for my own convenience and also reduced the amount of sugar used for all the components. The baking process was relatively manageable, albeit a little tedious.
 
The result was not bad but definitely far from Sprinkles Bake!

The cake turned out a little flat to my annoyance as my muffin pan size was too big for the cupcake cases I used. As a result, the cupcake cases widened after filling with batter :(
I've since consulted friends/bloggers who bake often and they used either silicone cases or aluminium cases to hold the cupcake bases. I was so enlightened :) and realised what a dumb dumb I was.

Taste-wise, I love it! The cake was moist and tender, matchmade in heaven with the salted caramel filling and salted buttercream frosting :) The taste was what I had in mind, but probably the saltiness could be more pronounced. Next time, I shall increase the amount of salt and salted butter.


Salted Caramel Cupcakes
(Recipe adapted from Sprinkle Bakes http://www.sprinklebakes.com/2010/05/triple-salted-caramel-cupcakes.html)

Makes 15 regular cupcakes or 20 small cupcakes
Cupcakes:
  • 192g all-purpose (plain) flour
  • 1 tsp baking powder
  •  ¼  tsp sea salt
  • 113g unsalted butter, at room temperature
  • 150g light brown sugar (original 245g)
  • 2 large eggs, at room temperature (60g eggs with shell)
  • 1 teaspoon vanilla extract
  • 125g buttermilk (substitute: add ½ tbsp of lemon juice to 125g of milk, stir and sit for 2 mins before using)
  1. Preheat oven to 160 degrees celsius. Line muffin tins with paper casing.
  2. Combine flour, baking powder and salt; sieve and set aside.
  3. Cream butter and brown sugar on medium-high speed until pale and fluffy.
  4. Add eggs, one at a time, beating until each is incorporated.
  5. Add vanilla extract. Mix and scrape down sides of bowl as needed.
  6. Add flour mixture in three batches, alternating with two additions of buttermilk, and beating until combined after each.
  7. Divide batter evenly among lined cups, filling each about halfway full.
  8. Bake for about 25 minutes. When done, transfer tins to wire racks to cool 10 minutes; turn out cupcakes onto racks and let cool completely.
Salted Caramel Filling:
  • 80g caster sugar (original 100g)
  • 43g salted butter, cubed
  • 60g heavy cream, at room temperature (substitute: whipping cream)
  1. Melt the sugar over medium high heat in a large pot.
  2. Whisk the sugar as it melts and cook until it becomes a deep amber color.
  3. Add the butter and stir it in until melted.
  4. Pour in the heavy cream (mixture will foam) and whisk until you get a smooth sauce. You may have some lumps but keep stirring until they have melted. Remove from heat and let cool.
  5. Cut a small round piece out of the tops of each cooled cupcake and pour in 1 teaspoon of caramel (or as desired). Replace the cake piece and set cupcakes aside.
Salted Caramel Buttercream Frosting:
  • 40g caster sugar (original 50g)
  • 2 tbsp water
  • 50g heavy cream (substitute: whipping cream)
  • 1 tsp vanilla extract
  • 113g salted butter
  • 113g unsalted butter
  • ½  tsp sea salt
  • 120g powdered sugar (original 190g)
  1. In a saucepan, stir together sugar and water. Bring to a boil over medium high heat. Cook without stirring until mixture turns a deep amber color.
  2. Remove from heat and slowly add in cream and vanilla, stirring until very smooth.
  3. Let caramel cool for about 20 minutes, until it is just barely warm and still pourable.
  4. In a mixer fitted with paddle attachment, beat butters and salt together until lightened and fluffy. Reduce speed to low and add powdered sugar. Mix until thoroughly combined. 
  5. Scrape down the side of the bowl and add the caramel. Beat on medium high speed until light and airy, and completely mixed (about 2 minutes).
  6. Mixture should be ready to use without refrigeration. If your caramel was too hot when added, it will cause your icing to be runny. If this happens refrigerate for 15-20 minutes.
  7. Top caramel-filled cupcakes with frosting.

I brought the cupcakes to my office and there were pretty well-received as well :) Definitely gonna attempt this recipe again. The next time, I must make the cupcakes taller instead of being so flat, and increase the salt level for a more distinct contrast between sweet and savoury. Till then!

09 September 2012

Hokkaido Chiffon Cupcakes - comparison of 2 recipes

The Hokkaido Chiffon Cupcake seems to be the "in-thing" now, a lot of homebakers are making it. (Other than Tau Huay of course :p).
 
It is supposed to be "light and cottony soft", so naturally I wanna have a go at it too :), especially since I like the texture of chiffon cakes very much. So I scouted different blogs for recipes and came across 2 recipes by Cuisine Paradise and Nasi Lemak Lover; both are in fact the same, except the difference in quantity.
 
The recipe uses the egg separation method, that is, egg whites are whipped separately and then folded into the main batter. I guess the steps are fairly simple to me since I have had experience in baking chiffon cakes. The curious thing about this recipe is, no baking powder/soda or cream of tartar is used. I followed the recipe to a T and didn't reduce the amount of sugar used since I believe sugar affects the texture of chiffon.
 
The verdict? The cake turned out quite light but not cottony soft enough in my opinion. Is it because I didn't beat the egg whites enough? I kept thinking what had gone wrong in my steps.
 
Then I saw the recipe by Reirei that was posted in FB under Singapore Homebakers group. Ah ha! Her recipe uses baking powder and cream of tartar! The rest of the ingredients are almost the same, in fact the liquid amount (oil and milk) is lesser. So I baked another small batch (halved her recipe) to test the difference.
 
This time round, the cupcake really turned out cottony soft even the next day! I love it, especially chilled. Hmmm, my conclusion is baking powder and cream of tartar do make a difference to the texture of the cake. I'm re-posting both recipes (based on yield of 9 cupcakes using square cases) below, test both recipes if you like and let me know your personal verdict :)


Hokkaido Chiffon Cupcakes (I)
(From Nasi Lemak Lover. Makes 9 cupcakes)
 
(A)
3 egg yolks
20g sugar
35g corn oil
60g milk
70g cake flour
 
(B)
3 egg whites
25g sugar
 
(C)
Filling
60g dairy whipping cream
10g sugar
1tsp instant custard powder
 
Icing sugar, for dusting (optional)
 
Method
1. Pre-heat oven to 170C.
2. Arrange paper liners on baking tray.
3. Hand whisk egg yolk and sugar till pale in colour.
4. Add in corn oil and milk, mix well.
5. Sift in cake flour, stir to combine.
6. Beat egg white until foamy, gradually add sugar, and continue beat till soft peak form.
7. Take 1/3 of egg white and use a hand whisk to mix into egg yolk batter.
8. Fold in the balance egg white with a spatula till well combine.
9. Scoop batter into pre-arranged paper liners to about ¾ full.
10. Bake for 20-25 mins at middle rack.
11. Beat whipping cream with sugar till firm and stiff (over a bowl of iced water).
12. Add in custard powder, mix well.
13. Pipe custard cream into cupcake and dust with icing sugar. Refrigerated before consume.


Hokkaido Chiffon Cupcakes (II)
(From Reirei of All That Matters
. Makes 9 cupcakes)
 
(A)
 3 egg yolks
 1/8 tsp salt
 24g corn oil
 24g milk
1/2 tsp vanilla extract
 32g cake flour
1/8 tsp baking powder (sift together with cake flour)

(B)
 3 egg white
1/4 tsp cream of tartar
 50g caster sugar
 
(C)
90g chilled fresh milk
 30g custard powder
1/2 tsp vanilla bean paste or extract
3/4 tbsp icing sugar (optional)
145g dairy whipping cream

Some Snow Powder (optional)

Method
1) Preheat oven to 175℃。
2) In a bowl, whisk egg yolks with salt. Then add oil, milk and vanilla extract, whisk till well-blended.
3) Fold in flour mixture and set aside.
4) In another bowl, beat egg whites , sugar and cream of tartar to stiff peak.
5) Scoop 1/3 of the egg white mixture to the yolk batter, fold well, then pour batter back to the remaining egg whites. Fold lightly till well-mixed.
6) Fill baking cases with about 30-32g of batter. Bake for 20 mins, then leave to cool.
7) In a separate bowl, mix milk, instant custard powder, vanilla paste and icing sugar till mixture is smooth.
8) Pour in whipping cream and beat till the thickness desired.
9) Using a piping tip, insert tip into the cake and pipe for 5 seconds. 3 to 4 seconds if you prefer less cream.
10) Sieve snow powder on top (optional) and chill cake before serving