27 February 2014

Molten salted egg yolk custard bun 流沙包 - AFF HK/Macau Jan/Feb 2014

When I was browsing the submissions for AFF HK/Macau yesterday, I came across a few entries on Salted Egg Yolk Custard Bun 流沙包. There and then, I had a strong urge to give it a try as well! So happened I bought a couple of chinese pastry ink stamps in Hong Kong, was raring to test them.


After reading through the recipes and steps from Bake for Happy Kids, Peng's Kitchen and Qi Qi in the house, decided to adapt the recipe from Qi Qi in the house first. I guess partly coz I was attracted to the looks of  the bao she made, very rustic looking with flower ink stamp :p


Followed Qi Qi's bao dough recipe and half her custard filling recipe. Started off with the custard filling first because it needed to be frozen to wrap neatly into the bao dough. Thereafter, waited about 1.5hrs before starting on the bao dough.

These are the chinese character 福, 發 pastry ink stamps which I bought from Shanghai Street in Hong Kong. The big one cost HKD59 and slightly bigger than 50 cent coin whereas the small one cost KHD49 and slightly bigger than 10 cent coin.

The custard filling was pretty straightforward to make. Basically steam the salted egg yolk for 7 mins, let cool and mash; cream sugar and butter together, then add custard powder, tapioca flour, corn flour, evaporated milk and the mashed yolk, blend well. After which, steam the mixture for 10 mins then blend again into a paste. The paste was very runny so I couldn't shape them at all. Just put it into a container and freeze for 2hrs.

The bao dough was easy as well. Just add all the ingredients together and knead till smooth, took about 10 mins. The dough would be very sticky at first, so it's recommended to add the liquid (milk) bit by bit instead of all at once. After proofing for 15 mins, dough was ready to use.

I managed to get 208g of dough which I divided into 8 portions of 26g each. As for the custard filling, 183g which I divided into 8 portions of 22g each. To make it easier, I used a disher or ice-cream scoop to scoop the custard filling. When rolling the dough, try to make the outer circle thinner leaving the inner circle thicker so that the skin wouldn't be too thin and burst during steaming. Thereafter, proof for another 30 mins and steam on high heat for 4 mins.

Tadah, the baos before steaming. I realised the Fu 福 is not as visible as the Fa 發. Probably I need more practice to make them look nicer. Managed to get only one that looked ok.

 Really adored how the chinese characters look on the baos.

The steamed buns! Couldn't resist breaking one open immediately. The filling didn't really flow out like lava as expected, only partially. But I was happy and satisfied enough for this first attempt. One bite and I couldn't stop! Tasted really good, the bao was fluffy and salted egg yolk custard sweet and savoury. There was also a bit of sandy feel in the tongue due to the salted egg yolk. Ooooh, I love it!


Molten Salted Egg Yolk Custard Bun 流沙包
(recipe from Qi Qi in the house, reference from Bake for Happy Kids, Peng's Kitchen)

Custard Filling (183g)
  • 3 Salted egg yolks
  • 60g Unsalted butter, slightly softened
  • 30g Caster sugar
  • 15g Custard powder
  • 5g Tapioca flour
  • 3g Corn flour
  • 25g Evaporated milk
Steps
  1. Steam salted egg yolk for 7 mins. After slightly cool down, mash finely and set aside.
  2. Cream butter and sugar till creamy, add custard powder, tapioca flour and corn flour, mix till blended.
  3. Scrap mixing bowl, add evaporated milk and mashed yolk, mix till well blended.
  4. Steam mixture for 10 mins. Remove from heat and let cool slightly.
  5. Blend into smooth paste, cool completely. Pour paste into container and freeze for 1.5-2hrs.
 Bao dough (208g)
  • 110g Hong Kong flour
  • 1 tsp Baking powder
  • 1 tsp Instant dry yeast
  • 15g Caster sugar
  • 75g Fresh milk
  • 8g Vegetable shortening
Steps
  1. Add flour, baking powder, yeast and sugar into a mixing bowl and stir till well mixed.
  2. Add fresh milk little by little, stir using a spatula until rough dough forms (use about 3/4 of milk).
  3. Place the dough onto a floured surface and knead. When the dough doesn't feel too sticky, add the remaining milk little by little and continue kneading.
  4. Add shortening to dough and knead, making sure shortening is well blended into the dough, pressing down any lumps.
  5. Knead till dough is smooth, takes about 10-15 mins in total.
  6. Shape dough into a ball, tucking in ends at the bottom. Place in large bowl, clingwrap and proof for 15 mins.
  7. After 15 mins, knead dough for a few secs, divide dough into 8 portions of 26g each.
Combine
  1. Roll each portion of dough into ball, then flatten using rolling pin or palm of hand.Try to roll the outer circle thinner, leaving inner circle thicker.
  2. Scoop a ball of frozen custard filling (22g each), place it onto the centre of the dough, then wrap up and pitch dough to ensure proper closing.
  3. Place on grease proof paper.
  4. Brush red/pink colouring onto chinese pastry ink stamp and gently stamp onto the middle of the bun.
  5. After completing all 8 buns, cover with clingwrap and proof for 30 mins.
  6. About 5 mins before buns are ready from proofing, heat up water in steamer on high heat.
  7. Once buns are ready, place into steamer and steam on high heat for 4 mins.
  8. Best serve warm.

I definitely need more practise to get the perfect lava flow custard filling, but not so soon since this is pretty sinful. Stay tuned!

I am submitting this post to Asian Food Fest ( Hong Kong + Macau ) – Jan+Feb Month hosted by Annie of Annielicious Food


26 February 2014

Papaya White Fungus Soup 木瓜雪耳汤 - AFF HK/Macau Jan/Feb 2014

Hubby and I are chinese soup lovers, especially double-stewed soup 老火汤 or double-boiled soup 炖汤. I guess coz he's a Cantonese and I'm influenced by him. The Cantonese believe that the appropriate use of different types of ingredients (such as chinese herbs, plants, roots, stems, leaves, fruits, fungi, flowers, beans and dried seafood) in cooking soups could aid in adjusting physical well-being for people and even provide medicinal properties. To us, soups are like comfort food both soothing and nutritious. I try to cook double-stewed or double-boiled soup at least 2 or 3 times a week.

The Cantonese are said to be masters in double-stewed/double-boiled soup and this is evident during our trip to Hong Kong over the weekend. We could see shops selling dried goods such as roots, plants, seafood everywhere. During our second night, we had dinner at a famous roast goose eatery near our hotel and we ordered their soup of the day (例汤) which was carrot and green radish soup. We were totally blown away by the depth of the soup, it was sweet 甘甜 and very soothing, unlike a lot of mediocre soups that are being served at eateries in Singapore which taste very flat. And this shop wasn't even a soup shop. The next day, we returned for dinner again, partly because of the roast goose (which was awesome by the way) and partly because of the soup. The soup of the day was lotus root soup and once again, it was so good. Rich, layered and sweet yet not overwhelming. Hubby told me that he wants to drink soups of this standard back home! Upon closer look at the soup, we found small pieces of pork bone as well as dried mussels. So far I've tried boiling soup with dried oysters but not mussels, probably this was what made the soup sweet? Anyways, I bought some dried mussels back to try, will update again on that.

I digress. Back to this soup Papaya White Fungus Soup 木瓜雪耳汤.

This soup recipe was from a HK TV programme Eating Well With Madam Wong 吾淑吾食 I watched on board Cathay Pacific. The cook host is Gigi Wong 黃淑儀 who's a local actress cum cook show host who cooks very well. This soup was said to be very soothing with stress-relief properties, so I took down the ingredients and steps of preparation.

The recipe uses a type of chinese sweet almond called Long Wang Xing 龙王杏 which I didn't manage to find. Instead, I found Da Nan Xing 大南杏 which according to the shop owner, it is good for soups as well as making almond milk.


Papaya White Fungus Soup 木瓜雪耳汤

Ingredients
  • 1 Green Papaya 青木瓜 (about 500g)
  • 440g Pork Front Hock 猪前赤
  • 30g White Fungus 雪耳 (soak white fungus till soft and cut away the hard parts)
  • 30g Dried Huaishan 淮山 (original uses dried sea coconut 海底椰, which is cool in nature. If your body constitution is cold nature 寒, replace by huaishan)
  • 40g Chinese Sweet/Bitter almond 南北杏
  • 20g Big chinese sweet almond 大南杏 (original uses Long Wang Xing 龙王杏)
  • 2.5L Water 水
Steps
  1. Boil a small pot of water with a slice of ginger. Once water boils, blanch the pork to rid grease and dirt.
  2. Add all the ingredients into a deep pot, add 2.5L of water.
  3. Bring to boil for about 5 to 10 mins, turn down to lowest heat and simmer for about 2 to 2.5hrs.
The soup was very light 清 and soothing 滋润, very comforting indeed. We love it! Gonna make more soups using the ingredients bought from HK soon.

I am submitting this post to Asian Food Fest ( Hong Kong + Macau ) – Jan+Feb Month hosted by Annie of Annielicious Food

25 February 2014

Shrimp roe shrimp dumpling noodles 蝦子水餃撈麵 - AFF HK/Macau Jan/Feb 2014

I just came back from a short vacation from Hong Kong yesterday =D

During this free and easy trip, I had the pleasure of trying some local favourite food/eatery based on recommendations by friends. One of them was shrimp roe noodle. I had never tried this noodle before until I saw Annie's post on shrimp roe wanton noodles for AFF HK/Macau and was very intrigued by the looks and curious about how it would taste like. Hence made a mental note to look out for shrimp roe noodles as well as shrimp roe so that I could try cooking this at home.


When hubby and I were heading towards the dried seafood and tonic street at Sheung Wan, we passed by this shop selling different flavours of noodle and yep shrimp roe noodle is also available. Bought an assortment of different flavours just to try :)


The shop also sells shrimp roe/spawn in packs of 10g, 15g and big bottle. Bought just a 15g packet since I reckoned I wouldn't need much. Also managed to find a bottle of shrimp paste/sauce at another shop selling dried goods.


Also decided to head to Sham Shui Po 深水埗 to try one of the noodle shop Lau Sum Kee Noodle 劉森記麵家 that's famous for its Shrimp roe noodle, so that at least I know how the original was supposed to taste like.

I ordered the 蝦子雲吞撈麵 Shrimp roe wanton dry noodles. How should I describe the taste? The noodles was very springy, a tad dry, the taste was just slightly saltish with a very interesting umami taste coming from the shrimp roe that was sprinkled very generous on top of the noodles. My noodle was served with sliced omasum (牛柏葉), a little surprised coz didn't know what it was and was it a standard side dish that came along? Anyway, the sliced omasum was very springy and crunchy but tasteless. I dipped it with some chilli sauce and it tasted better. The wanton was big and plump with pork and shrimp, tasted ok. But I preferred the shrimp dumpling which hubby ordered as the taste was enhanced with black fungus and mushroom.


Overall, I thought that the noodle was so-so, maybe I'm not a Cantonese and don't know how to appreciate it? Or maybe coz I was rather distracted by the large amount of sliced omasum. Anyway, hubby who's a Cantonese didn't like the shrimp roe noodle either. But then, he never liked this type of noodles, he preferred mee pok kind of noodles.


Anyways, since I already bought all the ingredients, might as well cook it right? I used Annie's recipe for the noodle dressing and made shrimp dumplings based on what I ate at Lau Sum Kee Noodle.

I must say I preferred Annie's version of making the dressing! Lau Sum Kee's noodles were quite dry, making it hard to chew and swallow, and there was too much shrimp roe sprinkled on the noodles. Whereas Annie's dressing sauce make the noodle slightly wetter and smoother to eat (I added a bit of chicken stock as well), and shrimp sauce complemented the shrimp roe very well. I used slightly lesser shrimp roe as I didn't want to be overwhelmed.

The noodles also went very well with the succulent shrimp dumplings which I added minced pork, fresh shrimp, fresh shiitake mushroom and black fungus.


Shrimp roe noodle
(recipe adapted from Annelicious food)

Ingredients
  • 1 portion Shrimp roe noodles
  • ½ tsp Shrimp sauce
  • ½ tsp Dark soy sauce
  • 1½ tsp Light soy sauce
  • 1 tsp Shallot oil
  • 1 Tbsp Chicken Stock
  • some spring onions
  • 2 stalks Choy sum
  • 1 heap tsp Shrimp roe (topping)
Steps
  1. Mix shrimp sauce, dark soy sauce, light soy sauce, shallot oil and chicken stock together and stir till well mixed.
  2. Cook shrimp roe noodles in hot boiling water until noodles are al dente. Drain.
  3. Blanch choy cum in hot boiling water added with some salt and oil. Drain.
  4. Mix noodles with the sauce, top with shrimp roe and spring onion.
  5. Serve with choy sum and shrimp dumplings at the side.
Shrimp dumplings
(makes 8 dumplings)

Ingredients
  • 60g Minced pork
  • 70g Fresh shrimp (3 medium size pcs)
  • 1 pc Fresh shiitake mushroom, cut into tiny cubes
  • 2-3 pcs Cloud ear fungus, soaked till soft (about 3g), cut into very small thin strips
  • 1 tsp Light soy sauce
  • 1/2 tsp Hua tiao wine
  • 1/2 tsp Corn starch
  • Dash of white pepper and sesame oil
  • 8 pcs Shanghainese dumpling skin (circle shape)
  • 2 cups Chicken stock
Steps
  1. Remove shell from prawns, devein, wash and pat dry. Use back of knife/cleaver to smash the prawns, chop prawns roughly.
  2. Mix all ingredients and seasonings together till well-blended and slightly gluey.
  3. Wrap the shrimp dumpling into semi-circle shapes.
  4. Cook the dumplings in boiling chicken stock. 
  5. Serve with noodles.

I am submitting this post to Asian Food Fest ( Hong Kong + Macau ) – Jan+Feb Month hosted by Annie of Annielicious Food

20 February 2014

Crochet Projects I

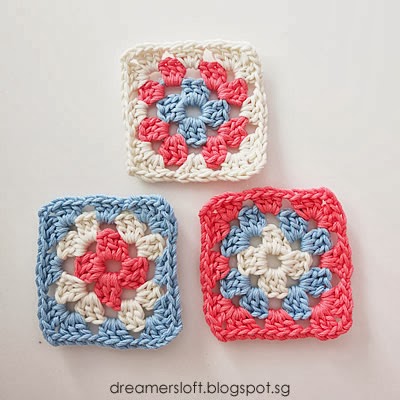
Since I attended a crochet workshop conducted by Sewinlove last month, I've been busy churning out lots of grannie squares, doilies as well as two kiss-lock purses!

Both the grannie square and doily patterns (symbol and text instructions) were included in workshop, and after working on a few, I got more confident. In fact, it's quite fun and addictive and I could multi-task while crocheting like watch you-tube videos or TV.

The blue-border one was done during the workshop, and subsequently I did another two during the same yarn and 6mm hook. Noticed the size got smaller? I think coz as I got more familiar with crocheting, the stitches became tighter.

These grannie squares were completed using cotton yarn and size 5mm hook.


All the above doilies were done using cotton yarn and size of hooks ranging from 4mm to 6mm.

These doilies and grannie squares were also completed using cotton yarn and hook size 5mm.

This was a different doily pattern, which I learnt from a youtube video. Cotton yarn with size 5mm hook.

These two grannie squares were also pattern that I found on youtube. Cotton yarn with size 4 or 4.5mm hook.

While I was making these two projects using the youtube videos as guides, I was very glad that I had attended the workshop because it provided basic knowledge and good foundation. Otherwise I don't think I would be able to understand the youtube videos.

Kiss-lock purse sold as DIY kit. Sooooo sweet!

Had some problems understanding both the symbol and text instructions initially but after some time managed to decipher and figure the crochet stitches. Before starting on this project, I had preferred symbol patterns but particularly for this project, I preferred the text instructions.

Had wanted to complete both purses for my mum and mil before CNY but due to some family matters, only managed to complete this second one recently. I must say this second one was much better done in terms of both crochet stitches and sewing and completed within a much shorter time frame overall.

Most of the grannie squares and doilies were taken by gifted to my mum and mil, including the the two kiss-lock purses :p So now I gotta start making more again! Also looking forward to attending more workshops such as amigurumi or lace accessories. Hopefully could share more on crocheting soon :)

18 February 2014

African Chicken 非洲鸡 - AFF HK/Macau Jan/Feb 2014

The other day I had a leftover chicken thigh (unused from previous night's dinner) and was pondering what to do with it for next day's lunch. Since we are still on AFF HK/Macau, decided to cook either the Portuguese style chicken or Macau African chicken. After looking through the list of ingredients for both recipes (from Table for 2... or more), selected the African chicken because I had all the ingredients on hand.

I remembered ordering something like African chicken or Portuguese chicken when I went to Macau many years back with hubby but totally couldn't recall the taste at all. Anyways, the ingredients are an interesting mix of both chinese and western styles such as five spice powder, coconut, peanut, rosemary, ketchup, parika?? Kind of curious how it would turn out.

Instead of using oven to bake the chicken, I decided to use my Happy Call pan, everything cooked using one pan, easier to wash and clean up since cooking only one chicken thigh mah :p


Macau African Chicken  非洲鸡
(adapted from Table for 2...or more)
  • 1 chicken thigh
  • 1 potato, peeled and cut into wedges (side dish)
Marinade
  • 1/4 tsp paprika
  • 1/4 tsp five spice powder
  • 2 shallots, finely minced
  • 1 garlic, finely minced
  • 1/4 tsp salt
  • dash of black pepper
  • 1 sprig rosemary, finely minced
Gravy
  • 4 shallots
  • 2 garlic
  • 2 chilli padi
  • 1 tsp paprika
  • 1/4 cup grated coconut
  • 1 Tbsp peanut butter
  • 1 Tbsp ketchup
  • 1 bay leaf
  • 1/2 pc chicken bouillon
  • 1cup water
Steps
  1. Marinate chicken thigh for at least 1 hr.
  2. Blend shallots, garlic and chilli into a coarse paste (I use electric blender).
  3. Heat Happy Call pan on medium low heat, toast grated coconut until fragrant and very slightly browned. Remove and set aside.
  4. Wipe pan clean and put in about 2 Tbsp of oil. Fry the potatoes until lightly golden and set aside.
  5. Using the same oil, put in the chicken thigh, fry till brown, no need  to cook through. Remove and set aside.
  6. Using the same oil, cook the paste (from step 2) on medium low heat until it turns glossy and fragrant.
  7. Add the remaining gravy ingredients. Let the ingredients come to a boil then lower heat to simmer for 2 mins.
  8. Add the chicken thigh and cover the Happy Call pan. Cook on low heat for about 7 mins then flip over the pan. Cook on low heat for about 7 mins. Watch closely and avoid the thigh from getting burnt, adjust heat and cooking time accordingly.
  9. Flip pan over, push the thigh and gravy to one side, add the potato (from step 4) and cook on low heat for about 2 mins.
  10. Remove chicken thigh and potato, place on serving plate, spoon gravy over thigh and serve warm.

I must say the gravy was very unique, rather dry, not quite satay sauce, not quite curry either. I used chilli padi so it was very spicy, but I could still taste a tinge of peanut butter with aroma from grated coconut and the spices. I quite like it! Not sure if hubby would like it though. Perhaps will cook it again another day for him to try.

I am submitting this post to Asian Food Fest ( Hong Kong + Macau ) – Jan+Feb Month hosted by Annie of Annielicious Food

13 February 2014

Swiss Wings 瑞士鸡翼 - AFF HK/Macau Jan/Feb 2014

Gosh, tomorrow is the 15th day of the Lunar New Year (元宵) which officially marks the end of the Chinese New Year festivity. Coincidentally it's also Valentine's Day. For me, the past two weeks had gone by in a blur, preoccupied mostly by family matters. Didn't have the mood to cook or blog or even post photos on FB, although I still have tons of unedited photos and many blog posts to write! Hope I can pick myself up soon!!

Somehow my mind draws blank whenever I need to deliberate on what to cook each day. Times like this, I would go for one pot dishes or very quick and easy recipes that require minimal preparation. I recalled Wendy's AFF posting on HK Swiss Wings last month and it's exactly what I'm looking for. Chicken wing is definitely well-loved in my family! I like it that the ingredients are so simple (everything is readily available in my kitchen) and cooking method so easy.

Actually I've never tried Swiss Wings before :p Yes, have seen it in Hong Kong cafes' menus but never occurred to me to order this dish. Probably coz there are just too many yummy food.


Swiss Wings  瑞士鸡翼
(recipe from Table for 2... or more)

Ingredients
  • 8 pcs chicken winglets
  • 1 bowl of ice cold water (enough to cover all the winglets)
  • 80g rock sugar
  • 50g dark soy sauce
  • 30g light soy sauce 
  • 1 tsp huatiao cooking wine (or Shaoxing)
  • 1 cup chicken stock (simple stock made using chicken feet and carcass, onion, carrot, radish)
  • 1 stalk spring onion (white part)
  • 3 slices ginger
Steps
  • Heat a pot of water (enough to cover all the winglets). When water comes to a boil, put in all the winglets and blanch for 1 minute till the chicken skin firms up.
  • Remove the winglets and immediately soak them in the bowl of ice cold water, for at least 5 mins.
  • Combine the rock sugar, dark soy sauce, light soy sauce, huatiao wine, chicken stock, spring onion and ginger into a cooking pot and bring to boil.
  • Once liquid has boiled, lower heat and simmer until the rock sugar has all melted (keep pot covered).
  • Once rock sugar has melted, remove ginger and spring onion and put in the chicken winglets. Let the winglets gently simmer for 15 mins (pot lid off).
  • Remove the winglets from the poaching liquid and serve.

I love the winglets, taste so yummy!! Succulent and tender, sweet and savoury. Hubby also gave thumbs up. 
The method of blanching the winglets and then soaking them in ice cold water helps make the winglets look and taste more succulent. The poaching liquid is simple yet goes so well with the wings. This recipe is definitely a keeper and I reckon this dish will appear on my dining table very often indeed!

I am submitting this post to Asian Food Fest ( Hong Kong + Macau ) – Jan+Feb Month hosted by Annie of Annielicious Food

05 February 2014

Luncheon Meat & Egg Sandwich 餐蛋治 - AFF HK/Macau Jan/Feb 2014

Whenever I go to Hong Kong, my favourite and must-order food when I visit local tea cafe 茶餐厅 is Luncheon Meat and Egg Sandwich 餐蛋治, which is basically canned luncheon meat (spam) with scrambled eggs sandwiched between lightly toasted soft white bread. (餐= 午餐肉, 治=三明治的簡稱. 餐蛋治=午餐肉炒雞蛋三明治)

I know, it's an extremely simple fare. Just three ingredients, salty and fragrant luncheon meat fried to a crisp, milky and smooth scrambled eggs, and fluffy yet crispy sandwich bread that's lightly toasted and buttered. To me, this combination is so comforting and satisfying.

Once in a while, I'll make this at home, not exactly the same but good enough to satisfy my cravings :)

Scramble eggs, I like to a little bit of whipping cream and fresh milk to the egg and fry with salted butter.

As for luncheon meat, the only brand my household eats is Shanghai Maling. Cut a thin slice about 0.5cm and fry till crispy and golden brown.

For the bread, don't use Gardenia or Sunshine type of bread, I buy the more premium sandwich loaf from bakeries. Butter one side of the bread and toast for a few mins till slightly browned.

Combine and cut into triangles to get two sandwiches.

Luncheon meat & egg sandwich
  • 1 egg
  • 1 tbsp dairy whipping cream
  • 1 tbsp fresh milk
  • 1 tbsp salted butter
  • 1 slice luncheon meat
  • 2 slices sandwich bread
  1. Add whipping cream and fresh milk to egg and beat lightly till well-mixed.
  2. Heat frying pan (medium low heat) with 1 tbsp of salted butter, when butter starts foaming, pour the egg mixture into the pan. After 10s, use a spatula and quickly stir the egg mixture to scramble it.
  3. Once one side is set, flip the egg and off fire, let residual heat cook the scramble egg.
  4. Cut a slice of luncheon meat about 0.5cm and fry using the same pan (no need to add oil) till golden brown and crispy.
  5. Spread thin layer of butter on one side of each slice of bread. Toast the bread till slightly brown.
  6. Combine the luncheon meat and scramble eggs on the two slices of bread. Cut into triangles and serve hot.
I love it best with a hot cup of tea with milk :)

I am submitting this post to Asian Food Fest ( Hong Kong + Macau ) – Jan+Feb Month hosted by Annie of Annielicious Food

03 February 2014

CNY Bakes 2014 - Salted Egg Yolk Cookies, Pineapple Tarts and Fried Arrowhead Chips

Happy Lunar New Year!

*Phew*, after four days (including reunion on the eve) of feasting and visiting, life is back to normal before another weekend of festivity begins. This year, our family has no plans to host any gatherings so initially I hadn't intend to bake any CNY goodies since we don't really eat much. Moreover, I was busy with dear son's birthday cake and another two rainbow/ombre cake orders two weeks before, coupled with all the attempts of spring cleaning, was feeling kind of lazy tired.

But after seeing all the yummy goodies churned out by friends on FB made my hands super itchy and I decided to join in the fun. Only did three items - salted egg yolk cookies (because I love savoury cookies and very intrigued by the taste), pineapple tarts (because when I asked the hubby what he wanted, he said pineapple tarts) and fried arrowhead chips (because I love it and arrowhead is only available this time of the year)

There are several recipes available on the internet, and all of them use similar ingredients. I adapted mine from Lena of Frozen Wings. I decided to add more salted egg yolk because I read some comments that the taste of salted egg yolk was very subtle. Steps are very simple as well so I let dear son get involved in the process. I liked how the dough turned out, soft and slightly pliable yet not tacky. I made them petite (2.5-3cm) so that I can just pop one whole piece into the mouth each time and yet not be too overwhelmed.

The above fluted ones were done by me; and below in hearts, stars and flowers by him (he stamped the shapes and put them on the baking tray after I rolled the dough for him). I must say he's quite good at it. Next year, I think I could recruit him if I'm baking this for sale :p

The cookies turned out scrumptious! Texture was slightly crispy and very brittle; taste-wise, not too sweet and slightly saltish with strong hints of the salted egg yolks. Very unique and addictive! My whole family loves it! This recipe is certainly a keeper for all upcoming CNYs.


Salted egg yolk cookies
(yields about 85-90 pieces, about 2.5-3cm each, 4-5mm thickness)
(Update as at 9 Jan 2015: yields about 70 pcs, 1 inch diameter, 6mm thickness)

Ingredients
  • 125g plain flour
  • 10g corn flour
  • 1/8 tsp baking powder
  • 1/2 tbsp milk powder
  • 1/4 tsp fine salt
  • 3 salted egg yolks
  • 85g unsalted butter
  • 40g caster sugar
  • 1 egg (lightly beaten for egg wash)
  • Sesame seeds (for decoration)
Steps
  1. Preheat oven at 160 degree Celsius (fan mode).
  2. Steam salted egg yolks for 5 mins, then mash coarsely and set aside.
  3. Sift plain flour, corn flour, baking powder, milk powder and fine salt together. Set aside.
  4. Cream unsalted butter and caster till light and fluffy.
  5. Add mashed egg yolks and mix till blended.
  6. Add flour mixture in 2 additions, mixing till just blended.
  7. Divide dough into 3 portions. Place each portion between 2 sheets of plastic/freezer bags (for ease of rolling and handling). Roll dough into 6mm thickness. Place the 3 portions of dough into chiller for 30 mins.
  8. After 30 mins, work with 1 portion of dough at a time. Stamp into desired shapes (mine cookie cutter is about 1 inch in diameter and arrange the cookies on baking paper or silpat mat in baking tray. Gently brush top of each cookie dough with some egg wash, sprinkle some sesame seeds. Repeat steps with remaining dough.
  9. Bake for 10-11 mins till slightly brown. (As the size of my cookies is very small, only 10-11 mins is needed, adjust accordingly for larger size cookies).
~~~~~~~~~~~~~~~~~~~~~~~~~~~~~~~~~~~~~~~~~~~~~~~~~~

And so, the hubby requested for pineapple tarts. I've made pineapple tarts before using Chef Christoper Tan's recipe from his cookbook, Shiok! and they turned out very nice. But I thought of trying a different recipe this time, so I went for Wendy's (Table for 2... or more) recipes for both pineapple jam and melt-in-the-mouth pineapple tarts. Not re-posting her recipes here as I followed all the steps.

Cooking the pineapple jam was a straightforward but very tedious process. Instead of grating, I blended the pineapple using an electric blender. Then literally sat in the kitchen for close to 2hrs to cook the jam. Just as Wendy advised, I didn't stir the jam continuously, just about once in every 5 mins, so I spent the in-between waiting time playing with iphone/ipad games :p

And the best advice for cooking pineapple jam were, wear a long kitchen mitten (mine can cover up till lower arms or maybe my arms are short lah) while stirring the jam and run far far away after each stir. Because the jam would splatter vigorously like volcano eruption (ok, a bit of exaggeration here) after each stir for about 1 min and it's very very hot. Certainly didn't want to burn face before CNY!

The dough was quite straightforward as well, but mine turned out to be quite tacky. Had to rub some vegetable oil onto my palms to wrap the tarts and wash hands quite frequently else the dough will stick all over my hands and unable to roll into a ball :(

The tarts turned out quite beautiful and I love the melt-in-the-mouth texture. The jam was a tad too sweet although I reduced a little bit of sugar. Luckily there was still a tinge of sourness. Alas, hubby didn't like it :( He claimed that the tarts tasted like those Taiwanese style ones which he didn't like. He preferred more crispy tart with pineapple jam that's grated (more texture and fibrous) instead of blended like jam. Grrrr....
My mum liked it though and preferred mine over the ones she bought from her neighbour.

Probably next year I will attempt a cheesy version so that I can have sweet, savoury and sour taste.

~~~~~~~~~~~~~~~~~~~~~~~~~~~~~~~~~~~~~~~~~~~~~~~~~~
Last but not least, my favourite fried arrowhead chips! Throughout my childhood, I know arrowhead as  Chiku 慈菇. They appear in the market usually one month before chinese new year and my mum would buy them to grow as a plant. The shoots of the arrowhead would grow upwards into leaves shaped like arrow so I guess that's how its name comes about. The leaves pointing upwards symbolises continuous improvement 步步高升 so it's very auspicious.

Some people also call in NgaKu 芽菇 which I learnt only recently. Anyways, this arrowhead chips seem to appear as a CNY food only recent years as well? Since I tasted it the year before, have been addicted to it. When I found out that it was very easy to make (from Wendy's blog once again), albeit tedious, decided to give it a try this year. Initially bought just 1kg to try and made one tub. It was actually quite fun so I bought another 1kg a few days later to make another tub. Couldn't resist snacking on the chips immediately after frying :p

Basically just peel the arrowhead, slice using slicer then deep fry. Some people dry the arrowhead slices using kitchen towel but I didn't bother and the chips turned out just as fine :)


One CNY snack that I didn't get to eat this year is the mini hay bee hiam spring roll. Don't think I wanna make them now, probably gonna buy one small tub just to satisfy my cravings :p

Here's wishing everyone a Happy & Prosperous HorseYear!